How to Remove a Pocket Door Without Removing Trim
Pocket doors are a brilliant space-saving solution, sliding neatly into a wall cavity instead of swinging open like traditional doors. However, removing a pocket door can seem daunting, especially when you want to avoid damaging or removing the surrounding trim. This guide will walk you through the process step-by-step, ensuring a smooth removal without unnecessary hassle or harm to your home’s finish.
Understanding Pocket Door Mechanics
What is a Pocket Door?
A pocket door is a sliding door that disappears into a compartment within the wall when opened. This design maximizes floor space, making it ideal for tight areas like bathrooms, closets, or small rooms. While traditional hinged doors require clearance to swing open, pocket doors simply glide into the wall, offering a sleek and functional alternative.
Components of a Pocket Door System
A pocket door system consists of several key parts: the door slab, rollers, track, frame, and trim. The rollers allow the door to slide smoothly along the track, while the frame and trim provide a finished look. Understanding these components is crucial, as improper handling during removal can lead to damage.
Tools and Materials Needed
To remove a pocket door without removing trim, gather the following tools:
- Screwdriver: For removing screws securing the track.
- Pliers: To assist with detaching hardware.
- Utility knife: For cutting through caulk or paint around the trim.
- Pry bar: To gently lift the door if needed.
- Level: To ensure the door is properly aligned during reinstallation if necessary.
Safety equipment like gloves and goggles is also recommended to protect against sharp edges or debris.
Step-by-Step Guide to Remove a Pocket Door Without Removing Trim
Preparation
Start by clearing the area around the door to ensure a safe workspace. Inspect the door and trim for any potential challenges, such as screws hidden beneath paint or caulk. This step will help you plan your approach and avoid surprises.
Removing the Door Slab
First, fully open the door to access the rollers. Gently lift the door slightly to disengage it from the track. Once lifted, tilt the door carefully and slide it out of the pocket. Be mindful of the weight and size of the door to prevent it from getting stuck or causing damage.
Detaching the Track and Rollers
Next, use a screwdriver to remove the screws securing the track to the frame. Once the track is loose, detach the rollers from the door slab. This step ensures that the door can be removed without dragging the hardware along.
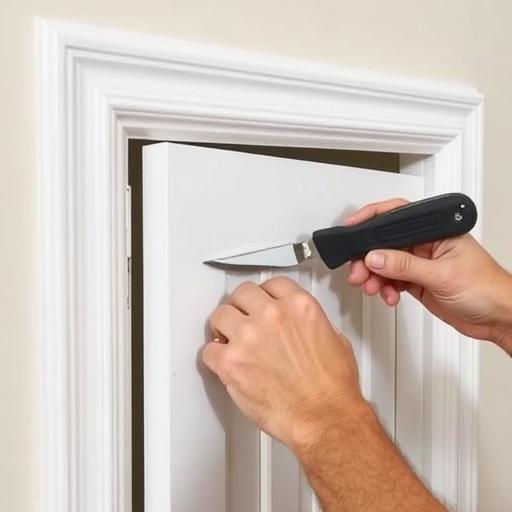
Addressing the Trim
To avoid damaging the trim, use a utility knife to carefully cut through any caulk or paint sealing the edges. This will allow you to work around the trim without forcing it open. Patience is key here to maintain the integrity of the surrounding finish.

Common Challenges and Solutions
One common issue is stuck rollers, which can make lifting the door difficult. In such cases, applying a lubricant like WD-40 can help loosen the mechanism. If the door is a tight fit, gently wiggle it while lifting to disengage it from the track. Hidden screws beneath paint or caulk can be tricky; use a utility knife to carefully expose them before removal.
Post-Removal Considerations
Inspecting the Pocket and Frame
After removing the door, inspect the pocket frame and trim for any damage or wear. This is an excellent opportunity to address minor repairs or perform maintenance, ensuring the space is ready for future use.
Storing or Repurposing the Door
If the door is in good condition, consider storing it for future reinstallation. Alternatively, you can repurpose it into a tabletop, shelf, or other DIY project. This not only saves resources but also adds a unique touch to your home.
Conclusion
Removing a pocket door without removing trim is a manageable DIY project with the right tools and approach. By following this guide, you can complete the task efficiently while preserving the surrounding finish. Whether you’re renovating or simply making adjustments, this process highlights the value of patience and precision in home improvement.
FAQ Section
Can I reuse the pocket door after removal?
Yes, if the door is in good condition, it can be reinstalled or repurposed for other projects.
What if the trim is glued or painted over?
Use a utility knife to carefully cut through the caulk or paint to avoid damaging the trim.

Do I need professional help to remove a pocket door?
While it’s a DIY-friendly project, professionals can help if you’re unsure or encounter difficulties.
How long does it take to remove a pocket door without removing trim?
The process typically takes 30 minutes to an hour, depending on the door’s condition and your experience.
Can I replace the pocket door with a regular door?
Yes, but you’ll need to install a new door frame and hinges, which may require additional work.