How to Put Hinges on a Door
Door hinges are the unsung heroes of your home, silently working to keep doors swinging smoothly and securely. Whether you’re hanging a brand-new door or replacing worn-out hinges, proper installation is crucial for both functionality and security. This guide provides a straightforward, step-by-step approach to installing door hinges like a seasoned pro, even if you’re a beginner. Remember safety first, wear eye protection, and take your time.
Essential Tools and Materials for Installing Door Hinges
Tools You’ll Need
- Screwdriver (Manual and/or Power Drill with Screwdriver Bits): A variety of sizes is helpful, but make sure the bit matches the screw head perfectly to avoid stripping.
- Chisel: Essential for creating the mortise (recess) where the hinge plate sits.
- Hammer: Used to gently tap the chisel to remove wood.
- Measuring Tape: For accurate placement of hinges.
- Pencil: For marking hinge locations and mortise outlines.
- Utility Knife: To score paint or caulk around the old hinges or door frame before removal.
- Level: To ensure the door is hung straight and plumb.
- Wood Shims: Used to level the door in the frame during installation.
- Mortise Gauge (Optional): Allows for precise and consistent marking of mortise depth and width.
Materials Needed
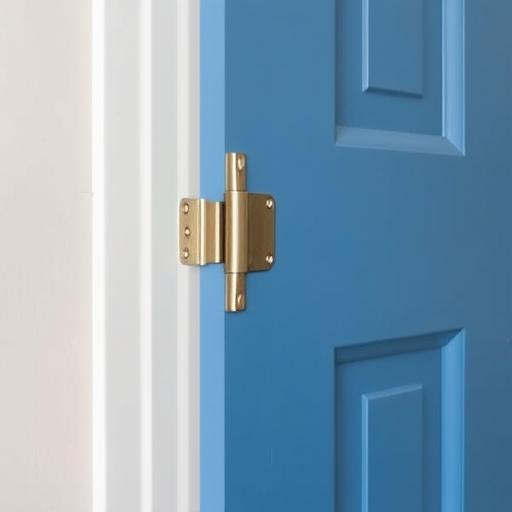
- Hinges (Appropriate Size and Type): Butt hinges are the most common, but ball-bearing hinges offer smoother operation for heavier doors. Choose a size appropriate for your door’s weight and thickness.
- Wood Screws (Matching the Hinges): The screws should be long enough to penetrate the door frame studs for a secure hold. Flat-head screws are typically used.
- Wood Filler (Optional): Use to repair damaged areas of the door or frame before installation.
- Wood Glue (Optional): Provides additional reinforcement in the mortises, especially when working with softer wood.
Step-by-Step Guide: Installing Door Hinges Like a Pro
Preparing the Door and Frame
Before you even think about hinges, preparation is key. This will ensure a smooth and easy installation.
- Removing the Old Door (If Applicable): Support the door and carefully remove the screws from the hinges, starting from the bottom.
- Repairing the Door or Frame (If Necessary): Fill any old screw holes with wood filler and allow to dry completely. Sand smooth before proceeding.
- Marking Hinge Placement: Mark the locations for the hinges on both the door and the frame. Typically, one hinge is placed near the top, one near the bottom, and a third in the middle for taller doors (over 6 feet).
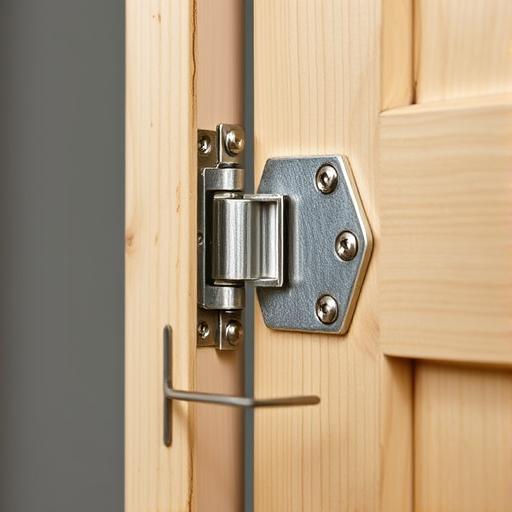
Mortising for the Hinges
Creating a recess for the hinges to sit flush is critical for proper door operation.
- Tracing the Hinge Outline: Place the hinge leaf on the marked location and trace around it with a pencil or utility knife. A mortise gauge can greatly improve accuracy.
- Chiseling the Mortise: Carefully chisel out the wood within the traced outline to the depth of the hinge plate. Hold the chisel at a slight angle and tap gently with the hamme. Remove small amounts of wood at a time.
- Checking the Fit: Place the hinge in the mortise. It should sit flush with the surface of the door and frame. Adjust the mortise if necessary until the hinge sits perfectly.
Attaching the Hinges
This is where you’ll physically connect hinges to the door and frame.
- Pilot Holes (Recommended): Drill pilot holes slightly smaller than the screw diameter to prevent splitting the wood, especially hardwoods.
- Securing the Hinges with Screws: Align the hinge leaf with the mortise and drive the screws straight and flush. Avoid over-tightening, which can strip the screw heads.
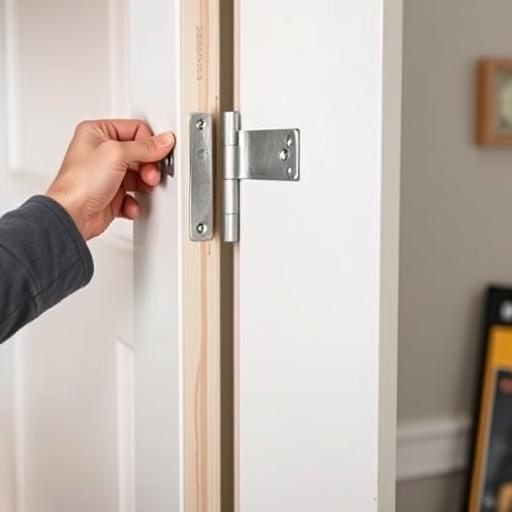
Hanging the Door
Now the magic happens! You’ll bring the door and frame together.
- Positioning the Door in the Frame: Use wood shims underneath the door to position it evenly in the frame, ensuring proper spacing at the top and sides.
- Attaching the Hinges to the Frame: Align the hinge leaf on the door with the corresponding mortise on the frame and secure it with screws.
- Testing the Door Swing: Open and close the door to check for smooth operation. Look for any binding or rubbing against the frame.
Adjusting and Fine-Tuning
The final touch ensures perfect operation.
- Identifying Common Issues: Check for problems such as door rubbing, sticking latch, or uneven gaps.
- Troubleshooting and Solutions: Adjust the shims, tighten or loosen hinge screws, or plane the door edge if necessary to correct any issues.
Tips for Success When Installing Door Hinges
Ensuring Proper Alignment
- Using a Level: Use a level to confirm the door frame is plumb and the door is hanging straight.
- Maintaining Consistent Spacing: Aim for consistent gaps between the door and the frame for a professional look and smooth operation.
Avoiding Common Mistakes
- Over-Tightening Screws: This can strip screw heads and weaken the wood. Tighten screws snugly, but not excessively.
- Stripping Screw Heads: Prevent this by using the correct screwdriver bit and applying firm, even pressure. If you do strip a screw head, try using a screw extractor or a rubber band for better grip.
- Incorrect Hinge Placement: Re-measure and double-check to ensure the hinges are positioned correctly before mortising.
Selecting the Right Hinge Type and Size
- Door Weight Considerations: Heavier doors require larger and stronger hinges. Ball-bearing hinges are often a good choice for heavier doors.
Maintaining Your Door Hinges for Long-Lasting Performance
Regular Lubrication
- Why Lubrication is Important: Lubrication prevents squeaking, reduces friction, and ensures smooth operation.
- Recommended Lubricants: Use silicone spray or white lithium grease for best results.
Tightening Loose Screws
- Checking and Tightening Regularly: Periodically check the hinge screws and tighten any that are loose to prevent door sagging.
Addressing Rust and Corrosion
- Cleaning and Protecting Hinges: Remove rust with a wire brush or steel wool and apply a rust-inhibiting primer or paint to protect the hinges.
FAQs About Door Hinge Installation
Q1: How do I choose the right size hinges for my door?
A1: Consider the door’s weight and thickness. A general guideline is to use 3.5-inch hinges for doors up to 60 pounds and 4-inch hinges for doors over 60 pounds.
Q2: What is the best way to remove stripped screws from hinges?
A2: Try using a screw extractor, placing a rubber band between the screwdriver and the screw head for better grip, or carefully cutting a new slot in the screw head with a Dremel tool.
Q3: How many hinges do I need for my door?
A3: A good rule of thumb is to use two hinges for doors up to 60 inches tall, three hinges for doors between 60 and 90 inches tall, and four hinges for doors taller than 90 inches or extremely heavy.
Q4: Can I reuse old hinges when installing a new door?
A4: Yes, you can, but it’s generally recommended to replace old hinges, especially if they’re showing signs of wear, rust, or damage. Inspect the old hinges to ensure they are straight and operate smoothly. New hinges will provide a fresh look and ensure optimal performance.
Conclusion
Installing door hinges might seem daunting, but by following these steps and paying attention to detail, you can achieve professional results. Patience and precision are key to a successful hinge installation, leading to a door that swings smoothly and securely for years to come. Now that you have the knowledge, why not tackle that wobbly door project? Check out your local hardware store for all the supplies you need to get started!