How To Sand Concrete
Sanding concrete, seemingly an unyielding material, might seem like an intimidating task. However, with the right techniques, tools, and safety measures, it can be accomplished with satisfying results. This guide will demystify the process of sanding concrete, from understanding the science behind concrete to mastering various sanding techniques, and ensuring safety during the process.
Understanding Concrete and Sanding
The Science Behind Concrete
Concrete is a composite material composed of hydrated cement, water, and aggregate (gravel and sand). The process of concrete hardening, or curing, occurs through a chemical reaction between the cement and water, binding the aggregates together.
Why Sand Concrete?
Sanding concrete isn’t just about making it smooth. It serves several purposes:
- Preparing for Sealing and Finishing: Sanding exposes the concrete’s pores, allowing sealers to penetrate deeply and providing a base for a smooth finish.
- Rectifying Imperfections: Sanding helps smooth out minor imperfections, such as trowel marks, sand wash, or CURING COMPOUND remnants.
- Exposing Aggregate in Decorative Concrete: In some cases, sanding is used to expose the aggregates for a decorative effect.
When to Sand Concrete
Concrete can be sanded at different stages:
- New Concrete: Newly poured concrete can be sanded after the curing process (usually after 28 days) to expose aggregate or prepare for a smooth finish.
- Old and Worn-Out Concrete: Concrete that has become dull, has efflorescence (white powdery deposit), or has minor imperfections can be sanded to renew its appearance.
Preparing the Concrete Surface
Timing and Environmental Considerations
- Sanding should be done when the surface temperature is between 50°F (10°C) and 90°F (32°C).
- Avoid sanding in direct sunlight or windy conditions to prevent dust blowing around.
Removing Debris and Loose Materials
- Use a broom and shovel or a leaf blower to remove any debris, dirt, or loose materials from the surface.
- Vacuum the surface to ensure no remaining particles can interfere with the sanding process.
Surface Assessment and Planning
- Inspect the surface for any major imperfections, cracks, or pops that need to be addressed before sanding.
- Choose the right sanding technique based on the surface conditions, desired outcome, and available tools.
Sanding Techniques and Tools
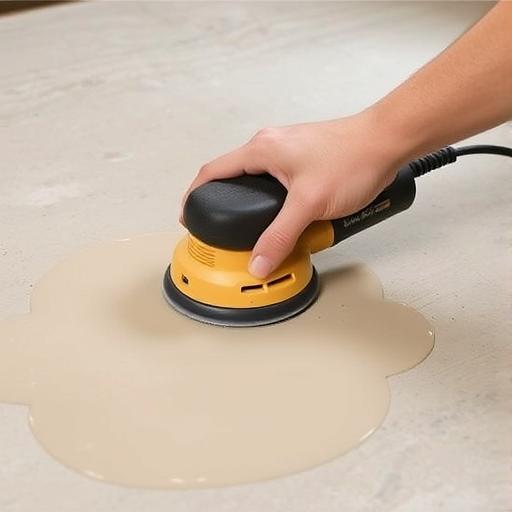
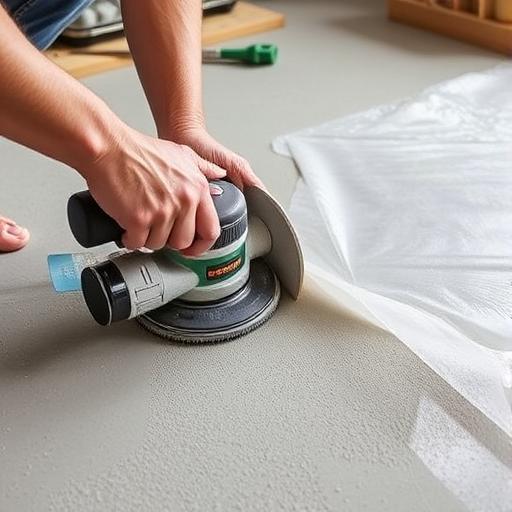
Dry Sanding Using Orbital Sander
Choosing the Right Orbital Sander: A random orbital sander is ideal for concrete surfaces. Ensure it’s powerful enough to handle the task and has a dust collection bag or port.
Selecting the Appropriate Sandpaper Grit:
– Start with coarse grit (e.g., 40-60) for heavy stock removal.
– Progress to finer grits (e.g., 80-120) for smoothing and refining the surface.
Step-by-Step Process:
– Apply light, even pressure while sanding in straight lines or overlapping ‘S’ patterns.
– Regularly check the surface for desired smoothness and change sandpaper as needed.
– Stop sanding when you’ve achieved the desired surface finish.
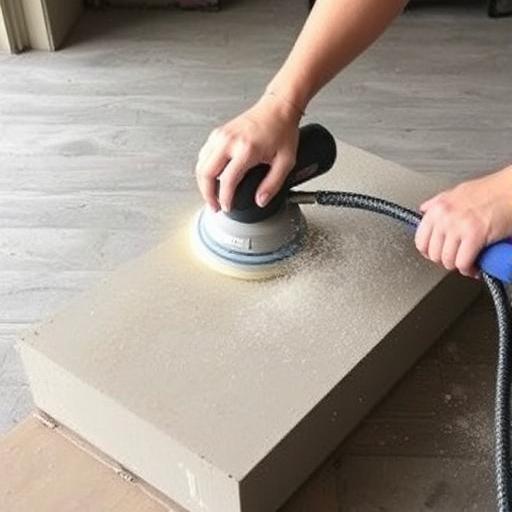
Wet Sanding with Hand Tools
- Using Sandpaper and a Hand-Held Sander: For small areas or touch-ups, use a hand-held sander with wet sandpaper (grit 60-120) to minimize dust.
- Wet Sanding Technique: Lightly mist the surface with water and sand in a circular motion, replenishing water as needed.C. Diamond Grinding for Heavy-Duty Applications
- Understanding Diamond Grinding: Diamond grinding uses diamond-impregnated blades or discs to remove concrete.
- Machines and Tips: Use walk-behind concrete grinders for larger areas or hand-held grinders for smaller ones. Wear proper PPE and keep the blade wet during operation.
Sanding Concrete Edges and Corners
- Aggressive Sanding for Sharp Edges: Use a flap disc or a brickie’s pencil (a metal tool with abrasive stones) to create sharp, crisp edges.
- Precise Sanding for Rounded Edges: For rounded edges, use a handheld grinder with a padded disc or sandpaper wrapped around a smaller diameter sanding pad.
- Cleaning and Preparing Edges for Finishing: After sanding, clean edges to remove dust and prepare for final finishing, such as sealing or painting.
Safety Measures During Concrete Sanding
Personal Protective Equipment (PPE)
- Eye Protection: Wear safety glasses or goggles to protect against dust and debris.
- Respirator for Dust Particle Inhalation: Use a respirator with a HEPA or P100 filter to protect against harmful dust.
- Gloves and Safety Shoes: Wear work gloves and safety shoes to protect hands and feet.
Working with Power Tools
- Proper Handling and Operation: Always follow the manufacturer’s instructions for operating power tools.
- Dust Collection and Suppression Techniques: Use dust collection systems (e.g., vacuum attachments, dust collection bags) and suppressors (e.g., wet sanding, barrier systems) to minimize dust.
After Sanding
Cleaning the Surface
- Removing Sanding Dust: Thoroughly clean the surface using a broom, shop vacuum, or wet/dry vacuum to remove all sanding dust and debris.
- Cleaning and Inspecting the Surface: Inspect the surface for any missed spots or imperfections that need further attention.
Professional Finishing Options
- Sealing and Staining: Seal the surface to protect it from water, stains, and damage. Staining can also enhance the color and appearance of the concrete.
- Polishing and Honing: For a high-end finish, consider polishing or honing the concrete after sanding, enhancing its natural beauty.
Conclusion
Sanding concrete is a versatile technique that can breathe new life into old surfaces or prepare new concrete for finishing. By understanding the science behind concrete and following the best practices outlined in this guide, you’ll be well-equipped to tackle your concrete sanding projects with confidence. So, don’t be intimidated by that rough surface – with the right tools and techniques, you’ll achieve a polished, professional-looking result.
FAQ
A. Can concrete be sanded multiple times?
– Yes, but with careful assessment of the surface. Each time concrete is sanded, some of its surface layer is removed. Be mindful of the existing finish and the amount of material being removed to avoid weakening the structure.
B. Is sanding new concrete necessary?
– Yes, to expose the aggregate and prepare for finishing. New concrete needs to be properly cured and, in some cases, sanded to remove any curing compounds, expose aggregates, or prepare for a smooth finish.
C. How can I get rid of deep scratches on my concrete floor?
– Diamond grinding might be needed to remove deep scratches. For deep scratches, diamond grinding can effectively remove a layer of concrete, taking out the imperfections. Follow up with sanding to refine the surface.
D. Do I need to sand concrete before applying a sealer?
– Yes, to ensure optimal sealer penetration and durability. Sanding opens the pores of the concrete, allowing sealers to penetrate deeply and providing a better bond, prolonging the sealer’s lifespan.
E. Can I sand concrete that has already been sealed?
– Yes, but with careful abrasion and potentially different sandpaper grit. Sanding previously sealed concrete requires a higher grit sandpaper (e.g., 120-150) to avoid damaging the sealant. Test a small area first to ensure the sealant isn’t affected.