How to Clean Oil Paint Brushes
As an artist, your oil paint brushes are your most valuable tools—so learning how to clean them properly is essential for maintaining their quality and longevity. Whether you’re a beginner or an experienced painter, neglecting brush care can lead to stiff bristles, paint buildup, and even permanent damage. Worse yet, improper cleaning can ruin your brushes faster than you expect, forcing you to replace them frequently. The good news? With the right techniques, you can keep your brushes in top condition for years. This guide will walk you through the best methods for cleaning oil paint brushes, ensuring they stay soft, flexible, and ready for your next masterpiece.
Why Properly Cleaning Oil Paint Brushes Matters
Taking the time to clean your oil paint brushes thoroughly isn’t just about aesthetics—it directly impacts your painting experience and the lifespan of your tools. When paint residue dries and hardens on bristles, it causes stiffness, making it difficult to achieve smooth, precise strokes. Over time, this buildup can also weaken the ferrule (the metal part holding the bristles), leading to bristle loss or separation. Proper cleaning ensures that your brushes remain responsive and maintain their original shape, allowing you to work with confidence. Additionally, well-maintained brushes save you money by reducing the need for frequent replacements.

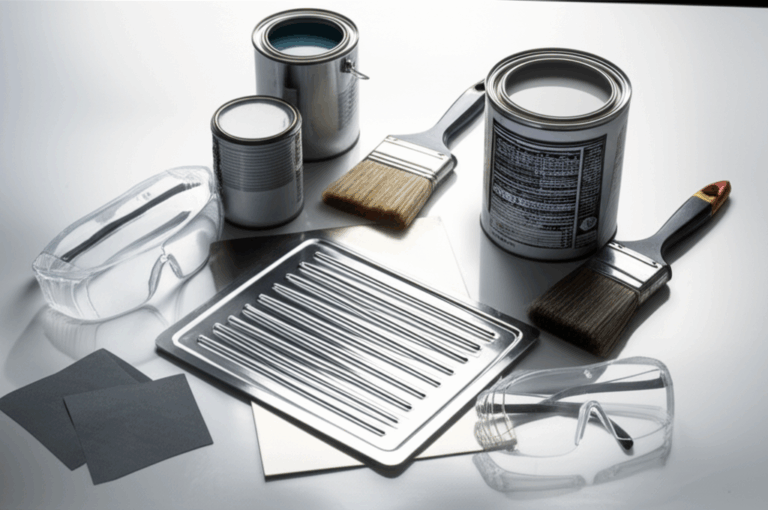
Materials Needed for Cleaning Oil Paint Brushes
Basic Supplies
- Solvent (e.g., odorless mineral spirits, turpentine, or citrus-based cleaners)
- Soft cloth or paper towels
- Brush cleaner or mild soap (for final rinse)
- Warm water
- Container for solvent (glass jar or metal container preferred)
Optional but Helpful Tools
- Brush comb or soft-bristle toothbrush
- Brush holder or rack for drying
- Gloves for skin protection
Step-by-Step Guide to Cleaning Oil Paint Brushes
1. Initial Wipe-Off: Remove Excess Paint
Before diving into deep cleaning, start by wiping off as much wet paint as possible from your brush. Use a paper towel or clean rag to gently blot the bristles, being careful not to press too hard, as this can damage the bristles. Removing excess paint first makes the cleaning process faster and more effective, reducing the amount of solvent needed.
2. Deep Cleaning with Solvent
Next, submerge the bristles in your chosen solvent (such as odorless mineral spirits) and let them soak for a few minutes to break down the oil paint. Swirl the brush gently or lightly brush the bristles against the container’s edge to loosen stubborn paint. Avoid soaking the ferrule, as prolonged exposure to solvents can weaken the metal over time. If the paint is particularly thick, you may need to repeat this step or use a soft brush to gently scrub the bristles.
3. Thorough Rinsing with Soap and Water
Once the solvent has dissolved most of the paint, it’s time to rinse the brush with mild soap and warm water. Use a small amount of dish soap or brush cleaner and gently swirl the brush in your hand to remove residual solvent and paint. Rinse thoroughly under running water until the water runs clear. This step ensures no solvent or paint residue remains, which could affect future painting sessions.
4. Shaping and Drying the Brushes
After cleaning, reshape the bristles while they’re still damp to maintain their original form. Gently tap the brush against a soft surface to remove excess water, then hang it upside down or place it in a brush holder to dry. Avoid storing brushes with the bristles facing up, as this can cause them to warp or lose their shape. Allow them to air-dry completely before storing to prevent mold or mildew.
Additional Tips for Maintaining Oil Paint Brushes
To keep your brushes in excellent condition, follow these best practices:
- Clean brushes immediately after use to prevent dried paint buildup.
- Rotate brushes regularly to prevent overuse and extend their lifespan.
- Store brushes in a cool, dry place away from direct sunlight to avoid damage.
- Avoid using harsh chemicals that can weaken bristles or corrode the ferrule.
Common Mistakes to Avoid When Cleaning Oil Paint Brushes
Even small mistakes can lead to damage, so steer clear of these common pitfalls:
- Using water directly on oil paint (this causes the paint to harden, making it nearly impossible to remove).
- Soaking brushes for too long (this weakens the bristles and can corrode the ferrule).
- Using abrasive materials (stiff brushes or harsh sponges can fray bristles).
- Leaving brushes bristle-down while drying (this causes the bristles to bend out of shape).
Conclusion
Cleaning your oil paint brushes properly is a small but crucial step in maintaining your artistic tools. By following these steps—removing excess paint, using the right solvents, rinsing thoroughly, and drying correctly—you’ll ensure your brushes stay in excellent condition for years. A well-maintained brush not only lasts longer but also enhances your painting experience by delivering smooth, precise strokes every time. Make brush cleaning a routine part of your artistic process, and your tools will reward you with consistent performance. Happy painting!
FAQ: How to Clean Oil Paint Brushes
1. Can I use water to clean oil paint brushes?
No, water can cause oil paint to harden. Always use a solvent first, then rinse with soap and water.
2. What’s the best solvent for oil paint brushes?
Odorless mineral spirits or citrus-based cleaners are safer than turpentine.
3. How do I clean dried oil paint from brushes?
Soak in solvent for longer, then gently scrub with a soft brush or toothbrush.
4. Can I reuse solvent for multiple cleanings?
Yes, but change it when it becomes murky and full of paint residue.
5. How often should I replace oil paint brushes?
With proper care, high-quality brushes can last years. Replace when bristles fray or separate.