How to Make a Threshold Ramp
Homeowners, DIY enthusiasts, caregivers, and anyone seeking to enhance home accessibility, this guide is for you. We’ll walk you through the process of creating a custom threshold ramp, step by step. By the end, you’ll have a practical, safe, and stylish solution to bridge gaps between floors, aid mobility, and reduce tripping hazards.
What is a Threshold Ramp?
A threshold ramp is a small, sloped structure designed to bridge gaps between floors, making it easier for people to move between rooms or through doorways safely. They are commonly used by wheelchair users, individuals with mobility challenges, and even those pushing strollers. There are various types of threshold ramps, including wooden, metal, and rubber, each with its applications and benefits.
Benefits of Threshold Ramps:
- Improve Accessibility: Threshold ramps enable people with mobility challenges to access areas previously inaccessible to them.
- Reduce Tripping Hazards: By eliminating height differences, ramps prevent accidents caused by tripping or caught wheels.
- Enhance Mobility: Ramps make it easier for anyone to move heavy objects or equipment between rooms.
Tools and Materials Needed
To build a threshold ramp, you’ll need the following tools and materials:
Essential Tools:
- Circular saw or jigsaw
- Hand saw
- Drill and driver bits
- Measuring tape
- Carpenter’s square
- Sandpaper (120-grit)
- Safety gear (gloves, goggles, dust mask)Materials:
- Plywood (minimum 1/2″ thickness) or other ramp material (wood, metal, rubber)
- Screws (1-1/4″ to 2″ long, depending on material thickness)
- Slip-resistant tape or textured paint (optional)
Carriage bolts, nuts, and washers (if using a permanent attachment method)
Safety First:
Wear appropriate safety gear during the construction process to protect yourself from injuries.
Step-by-Step Guide to Building a Threshold Ramp
Measure the Threshold
Accurate measurements are crucial for a properly fitted ramp.
- Width: Measure the width of the threshold. The ramp should be at least as wide as the threshold it bridges.
- Height: Measure the height difference between the two surfaces. The ramp should match this height difference precisely.
- Depth: Measure the depth of the threshold. The ramp should extend beyond the threshold by a few inches on both sides for stability.
Choose the Right Material
Selecting the right material depends on your specific needs and environment.
- Wood: Inexpensive, easy to work with, and can be stained or painted to match decor. Choose pressure-treated lumber for outdoor use.
- Metal: Durable, long-lasting, and low-maintenance. Ideal for heavy-duty use but may require special cutting tools.
- Rubber: Weather-resistant, provides excellent traction, and helps absorb impact. More expensive and harder to customize.Consider the following factors when choosing a material:
- Weight capacity
- Weather resistance (for outdoor use)
Aesthetics and décor compatibility
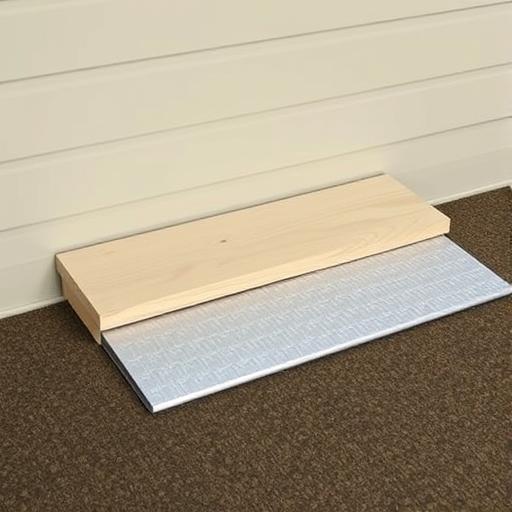
Cut the Ramp Base
Cut the ramp base to the measurements taken earlier.
Using a circular saw or jigsaw, cut the base material to the correct width and depth. Ensure the edges are clean and smooth.
For the ramp’s slope, the length should be approximately 12 times the height of the threshold. For example, if the threshold is 1″ high, the ramp should be 12″ long.
Add a Slip-Resistant Surface
- Prevent accidents by adding a slip-resistant surface to the ramp.
- Adhesive strips: Apply strips of slip-resistant tape (e.g., grip tape, safety tape) along the surface of the ramp.
- Textured paint: Paint the ramp surface with a textured or non-slip paint for added traction.
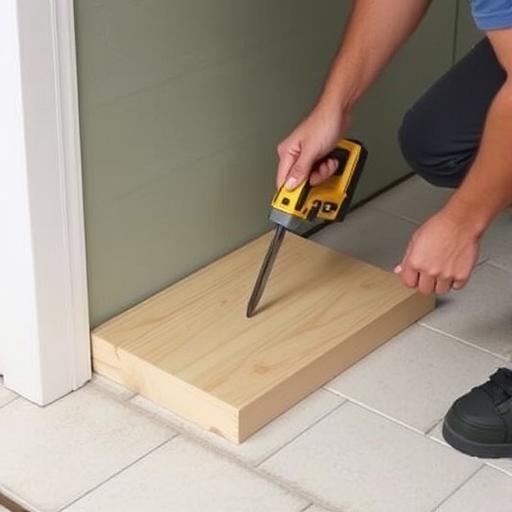
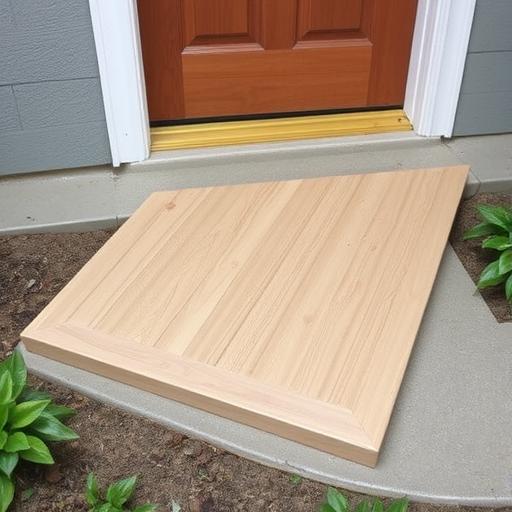
Secure the Ramp in Place
- Secure the ramp firmly to ensure stability and prevent it from moving or wobbling.
- Screws and brackets: Attach the ramp using screws and brackets. Pre-drill holes to prevent the material from splitting.
- Adhesive: For a non-permanent solution, use strong adhesive to secure the ramp in place. Ensure the adhesive is compatible with the surface material.
- Always perform a stability test by attempting to move the ramp without causing it to shift or wobble.
Tips for a Professional Finish
Refine your threshold ramp with these finishing touches:
Sanding and Smoothing:
- Use sandpaper to remove rough edges, splinters, and saw marks.
- Ensure the ramp edges and surface are smooth and comfortable to touch.Painting or Staining:
- Apply paint or stain to enhance the ramp’s durability and aesthetics.
- Choose a color that complements your home decor and consider using a non-slip paint or sealant.Regular Maintenance:
- Inspect the ramp periodically for signs of wear or damage.
- Clean the ramp as needed to maintain its slip-resistant properties.
- Tighten any loose screws or bolts to ensure the ramp remains secure.
Alternative Solutions
Evaluate these alternative threshold ramp solutions:
Pre-Made Ramps:
- Pros: Ready to use, available in various sizes and materials.
- Cons: Limited customization, may not fit perfectly, and can be more expensive.
Adjustable Ramps:
- Modular ramps: Can be adjusted to fit different threshold heights. Ideal for use with wheelchairs but may be more expensive.
- Foldable ramps: Easy to store and transport. Suitable for occasional use but may not provide the same stability as a custom-built ramp.DIY vs. Professional Installation:
- If you’re unsure about your skills or the ramp’s complexity, consider hiring a professional.
FAQ Section

Q1: How much weight can a DIY threshold ramp support?
The load capacity depends on the material, thickness, and construction method. A 1/2″ thick plywood ramp can support around 300-400 lbs, while thicker materials or metal ramps can support more.
Q2: What’s the best material for an outdoor threshold ramp?
Treated wood or metal are excellent choices for outdoor use due to their weather resistance and durability.
Q3: How do I ensure the ramp is ADA-compliant?
Follow the ADA guidelines for slope (no steeper than 1:12), width (minimum 36″ wide), and safety features (non-slip surface, level landing at the top).
Q4: Can I use a threshold ramp for both wheelchairs and strollers?
Yes, a properly designed threshold ramp can accommodate both wheelchairs and strollers with ease. Opt for a universal design, considering the largest wheel size (typically 24″-25″ for wheelchairs and 12″-16″ for strollers).
Q5: How long does it take to build a threshold ramp?
The time required depends on your skill level and available tools. On average, expect to spend 1-3 hours building a threshold ramp.
Conclusion
By following this comprehensive guide, you’ll be well on your way to creating a safe, convenient, and decorative threshold ramp. Embrace the benefits of enhanced accessibility and improved safety by taking on this DIY project today. Share your experiences and ask questions in the comments below – we’d love to hear from you!
Let’s make every home a welcoming space for all!