How to Paint a Door
Painting a door might seem like a simple task, but it’s one that can dramatically enhance the look and longevity of your home. A fresh coat of paint not only boosts curb appeal but also protects the door from wear and tear caused by weather, dirt, and daily use. However, skipping essential steps like proper preparation or using the wrong paint can lead to disappointing results. In this guide, we’ll walk you through the entire process, from gathering the right tools to applying the final coat, ensuring your door looks flawless and lasts for years to come.
Step-by-Step Process
Prepare the Surface
Clean, sand, and remove old paint or debris.
Apply Primer
Use a suitable primer for adhesion and coverage.
Paint the Door
Apply paint evenly with a brush or roller.
Let It Dry
Allow paint to dry completely between coats.
Rehang the Door
Reattach hardware and hang the door securely.
Process infographic for How to Paint a Door
Preparing to Paint a Door
Gather the Necessary Tools and Materials
Before you start, make sure you have all the essentials on hand. You’ll need a screwdriver, sandpaper (120-220 grit), painter’s tape, drop cloths, a high-quality brush or roller, and a paint tray. For the paint itself, choose between latex (easy to clean and quick-drying) or oil-based (durable but longer drying time) options. The finish is also important—semi-gloss or satin works well for doors due to their durability and ease of cleaning.
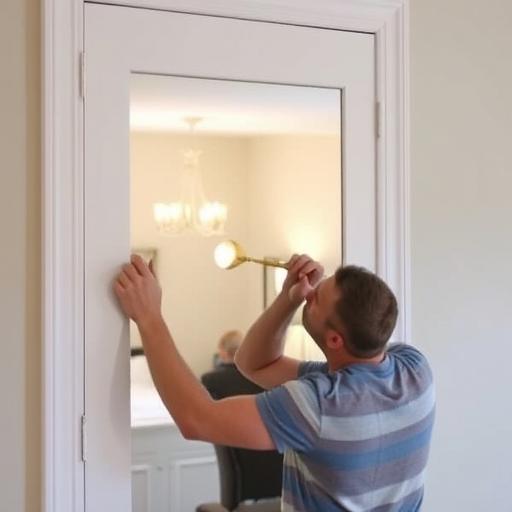
Remove the Door from Hinges (If Possible)
Taking the door off its hinges makes the painting process much easier and ensures you can reach all edges and corners. Use a screwdriver to carefully remove the hinges, and place the door on a pair of sawhorses or a flat surface. Label the hinges and their positions to make reattaching the door hassle-free.
Clean the Door Thoroughly
Dirt, grease, and old paint can prevent the new coat from adhering properly. Clean the door using a mixture of dish soap and water, or a stronger cleaner like TSP (trisodium phosphate) for stubborn grime. Rinse thoroughly and let it dry completely before moving on to the next step.
Sand the Door for a Smooth Surface
Sanding is crucial for creating a surface that paint can stick to. Use 120-grit sandpaper to remove old paint or varnish and 220-grit for smoothing the surface. Sand in the direction of the wood grain to avoid scratches, and wipe away dust with a damp cloth.
Repair Any Damage
Fill dents, scratches, or holes with wood filler or putty. Once the filler is dry, sand it smooth to ensure a seamless finish. This step is especially important for older doors that may have accumulated damage over time.
Priming the Door for Long-Lasting Results
Choose the Right Primer
Primer helps the paint adhere better and provides a uniform base. Use an oil-based primer for wood doors or a water-based primer for MDF or metal doors. Priming is especially important if you’re making a dramatic color change or painting over a dark shade.
Apply Primer Evenly
Using a brush or roller, apply the primer in thin, even coats. Work from the top to the bottom, and pay extra attention to edges and grooves. Allow the primer to dry completely (check the manufacturer’s instructions for drying times) and lightly sand between coats if necessary.
Painting the Door Like a Pro
Select the Right Paint and Brushes
For doors, semi-gloss or satin finishes are ideal because they’re durable and easy to clean. Use an angled sash brush for edges and a high-quality roller or brush for larger surfaces. This ensures smooth, even coverage.
Apply Paint in Thin, Even Coats
Start by painting the edges and grooves, then move on to the larger panels. Work from top to bottom to avoid drips. Two to three thin coats are usually enough for full coverage. Allow each coat to dry completely before applying the next.
Avoid Brush Marks and Drips
To achieve a smooth finish, don’t overload your brush with paint. Work quickly but carefully, and use long, even strokes. If you notice drips, smooth them out immediately with your brush.
Finishing Touches and Reassembly
Let the Paint Dry Completely
Patience is key. Allow the paint to dry fully according to the manufacturer’s instructions. Avoid touching or reattaching the door until it’s completely dry to prevent smudges or damage.
Reattach the Door to Hinges
Once the paint is dry, carefully reattach the door to its hinges. Ensure it’s properly aligned and opens and closes smoothly. If necessary, adjust the hinges for a perfect fit.
Final Inspection and Touch-Ups
Inspect the door for any missed spots or uneven areas. Make minor touch-ups as needed to ensure a flawless finish. Step back and admire your work—your door should look brand new!
Conclusion
Painting a door is a rewarding project that can transform the look of your home. By following these steps—proper preparation, priming, painting, and finishing—you’ll achieve professional-quality results. Take your time, and don’t rush the process. With a little effort, your door will not only look great but also stand up to the test of time. For ongoing maintenance, clean the door regularly and touch up any scratches or chips as needed.

FAQs
Q1: Do I need to remove the door to paint it?
While it’s not mandatory, removing the door makes the process easier and ensures better coverage, especially on edges and corners.
Q2: Can I paint a door without priming?
Priming is essential for most projects, especially if you’re changing colors or painting over a dark shade. It ensures better adhesion and a more even finish.
Q3: How long should I wait between coats of paint?
Drying times vary by paint type. Typically, wait 2-4 hours for latex paint and 6-8 hours for oil-based paint. Check the manufacturer’s instructions for specific guidance.
Q4: What’s the best paint finish for interior doors?
Semi-gloss or satin finishes are ideal for interior doors because they’re durable, easy to clean, and offer a subtle sheen.
Q5: How do I fix paint drips after they dry?
Lightly sand the drip with fine-grit sandpaper, then touch up the area with a small amount of paint. Blend it carefully for a seamless finish.