How To Polish Concrete By Hand
Polishing concrete by hand is a rewarding DIY project that transforms dull surfaces into sleek, professional-looking finishes. Unlike machine polishing, hand-polishing offers greater control, making it ideal for small areas, intricate designs, or those working on a budget. It’s also a cost-effective way to upgrade your space without investing in expensive equipment. To get started, you’ll need basic tools like hand grinders, diamond polishing pads, and safety gear. Whether you’re a beginner or a seasoned DIYer, this guide will walk you through the process of hand-polishing concrete like a pro.
Why Polish Concrete by Hand?
The Advantages of Hand-Polishing Concrete
Hand-polishing concrete offers several unique benefits. It provides precision, allowing you to work on detailed areas that machines might miss. It’s also more affordable since it doesn’t require specialized equipment. For beginners, it’s an accessible way to learn the basics of concrete polishing without the complexity of operating heavy machinery. Additionally, hand-polishing is quieter and less dusty compared to machine-based methods, making it a great option for indoor projects.
When to Choose Hand-Polishing Over Machines
Hand-polishing is particularly suited for small spaces, like bathrooms or countertops, where machines might be too cumbersome. It’s also ideal for intricate designs, edges, or corners that require meticulous attention. If you’re working on a tight budget or prefer a more hands-on approach, hand-polishing is the way to go. However, for large-scale projects, machine-polishing may be more efficient.
Tools and Materials Needed for Hand-Polishing
Essential Tools for Polishing Concrete by Hand
-
- Hand grinder or sander
- Diamond polishing pads (50-grit to 3000-grit)
- Sandpaper (for detailed areas)
- Safety gear (gloves, goggles, and a mask)
Choosing the Right Materials
Selecting the right polishing pads is crucial for achieving your desired finish. Start with coarse grits (50-200) to remove imperfections, then progress to finer grits (400-3000) for a smooth, polished surface. For glossy finishes, opt for high-grit pads and consider using a sealant to enhance shine and durability.
Step-by-Step Guide to Polishing Concrete by Hand
Preparing the Concrete Surface
Begin by thoroughly cleaning the concrete to remove dirt, grease, or debris. Repair any cracks or imperfections using a concrete patching compound. Allow the surface to dry completely before starting the polishing process.
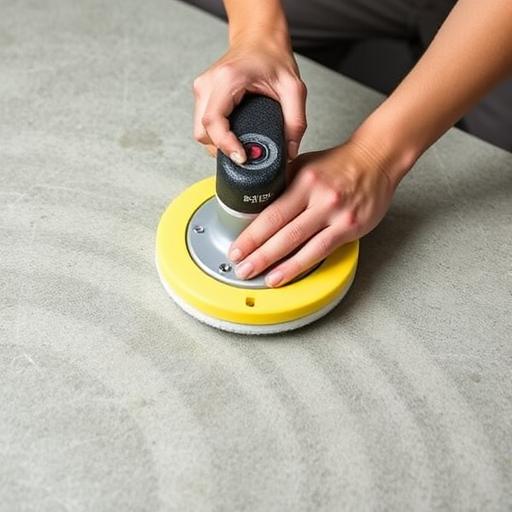
Grinding and Initial Sanding
Use a hand grinder or sander with a low-grit diamond pad (50-200) to remove the top layer of concrete. Focus on leveling the surface and eliminating any stubborn stains or blemishes. Work in small sections for better control.
Progressing Through Finer Grits
Once the surface is even, switch to medium-grit pads (400-800) to smooth out scratches. Gradually move to higher-grit pads (1500-3000) to refine the finish. Each step should build upon the previous one, ensuring a seamless transition from coarse to polished.
Applying a Protective Sealant
After achieving the desired finish, apply a concrete sealant to protect the surface and enhance its shine. Use a roller or brush for even application, and allow it to dry completely before use.
Tips and Tricks for a Professional Finish
Best Practices for Hand-Polishing Concrete
Work in small sections to maintain consistency and avoid overworking the surface. Apply even pressure to prevent uneven spots, and clean the area between grit changes to remove dust and debris. Patience is key—take your time to achieve the best results.
Common Mistakes to Avoid
- Skipping grits, which can leave scratches or an uneven finish
- Rushing the process, leading to subpar results
- Neglecting safety precautions, such as wearing protective gear
Maintenance of Hand-Polished Concrete
Regular cleaning with a mild detergent and water will keep your polished concrete looking its best. Avoid harsh chemicals that can damage the surface. For long-lasting results, reseal the concrete every 1-2 years to maintain its shine and protect it from wear and tear.
Conclusion
Polishing concrete by hand is a cost-effective and rewarding way to enhance your space. With the right tools, materials, and techniques, you can achieve a professional-looking finish even as a DIYer. Whether you’re tackling a small project or adding intricate details, hand-polishing offers unmatched precision and control. Give it a try and share your experience—it might just become your new favorite DIY skill!
Frequently Asked Questions About Hand-Polishing Concrete
Can I hand-polish any type of concrete?
Most types of concrete can be hand-polished, but it’s best suited for smooth, flat surfaces. Textured or porous concrete may require additional preparation or machine assistance.
How long does it take to polish concrete by hand?
The time required depends on the project size and complexity. Small areas may take a few hours, while larger surfaces could take a full day or more.
Is hand-polishing as effective as using a machine?
While machines are faster, hand-polishing can achieve comparable results, especially for detailed work or small spaces.
What’s the difference between hand-polishing and buffing?
Hand-polishing involves grinding and smoothing the surface, while buffing focuses on enhancing shine using finer abrasives or polishing compounds.
Can I achieve a mirror-like finish by hand?
Yes, with high-grit pads and proper sealing, you can achieve a glossy, mirror-like finish by hand. Patience and attention to detail are essential for this level of refinement.