How to Smooth Rough Concrete Edges
Smooth edges aren’t just a cosmetic concern; they’re crucial for safety, aesthetics, and the longevity of concrete surfaces. Rough edges can occur after cutting, pouring, or simply through the aging process. In this guide, we’ll show you how to smooth rough concrete edges using simple tools and techniques. Let’s dive in!
Why Smooth Concrete Edges Matter
Safety Concerns
Rough concrete edges can cause severe injuries. They’re easy to snag clothing on, leading to falls, or cause cuts if you accidentally brush against them. Smoothing them out creates a safer environment, especially in high-traffic areas.
Aesthetic Appeal
Smooth edges give your concrete surfaces a polished, finished look. They can make a significant difference in the overall appearance of patios, driveways, and walkways. By smoothing them out, you can enhance the curb appeal of your home or business.
Preventing Further Damage
Rough edges are vulnerable to chipping, flaking, and other forms of damage. Smoothing them out strengthens the edges and prevents further deterioration, prolonging the life of your concrete surfaces.
Tools and Materials Needed
Essential Tools
- Angle grinder with diamond blades
- Concrete sandpaper (coarse and fine grit)
- Chisels and hand files
- Trowel (for applying patching compound or sealant)
Safety Gear
- Work gloves
- Safety goggles
- Dust mask or respirator
- Ear protection (for using power tools)Additional Materials
- Concrete patching compound or epoxy
- Sealant (optional, for a finished look)
- Step-by-Step Guide to Smoothing Rough Concrete Edges
Preparing the Surface
- Clean the area thoroughly to remove any debris or loose particles.
- Ensure the surface is dry before proceeding. If it’s wet, allow it to air dry or use a Shop-Vac to speed up the process.
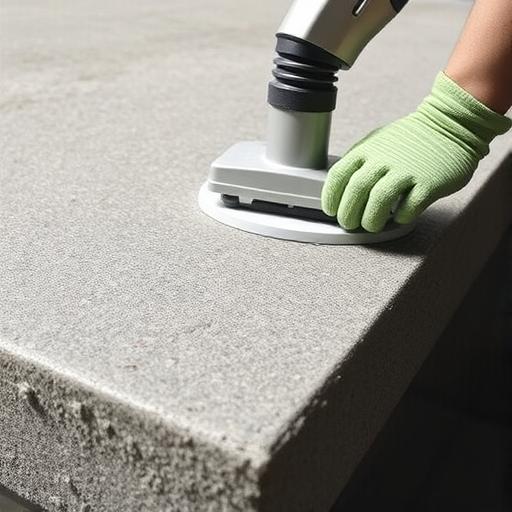
Grinding the Edges
Put on your safety gear.
- Attach a diamond blade to your angle grinder. Start with a coarse blade (e.g., 30-50 grit) for heavy smoothing.
- Hold the grinder flat against the edge at a 45-degree angle. Apply consistent pressure as you move the grinder along the edge. Work in small sections to ensure an even finish.
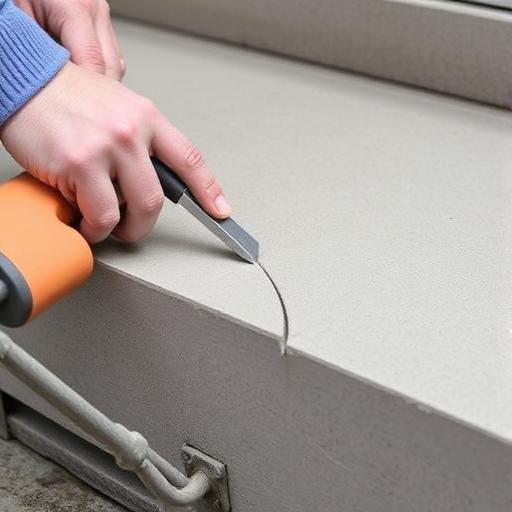
- For deep gouges or damaged areas, use a chisel to remove the excess material before grinding.
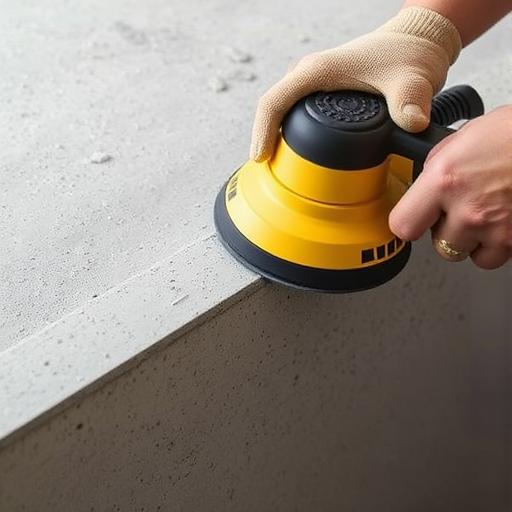
Sanding and Finishing
Once you’ve eliminated the major roughness, switch to a fine-grit diamond blade (e.g., 80-120 grit) for a smoother finish.
Replicate the process from the previous step.
If needed, use concrete sandpaper or a hand file for finer smoothing. This is especially useful for hard-to-reach areas or sharp corners.
Applying Sealant or Patch
If there are still gaps or cracks, apply a thin layer of concrete patching compound or epoxy to fill them in. Use a trowel to spread the material evenly.
Allow the patch to dry and cure according to the manufacturer’s instructions.
Optionally, apply a sealant to protect the surface and enhance its appearance. Choose a sealant that’s compatible with the type of patching compound or epoxy used.
Tips for Achieving Professional Results
Work in Small Sections
Breaking down the work into smaller, manageable sections helps ensure precision and consistency. It also makes it easier to monitor your progress and touch up any areas that need further attention.
Keep the Surface Wet
Wet grinding reduces dust, improves efficiency, and helps prevent overheating. Simply mist the surface with water as you work.
Test the Smoothness
Run your hand over the surface to check for any remaining roughness. This tactile approach can help you identify areas that need additional smoothing.
Common Mistakes to Avoid
Skipping Safety Precautions
Always wear the appropriate safety gear to protect against dust, debris, and potential injury. This includes gloves, goggles, a dust mask, and ear protection.
Over-Grinding
Be cautious not to remove too much material, as this can weaken the concrete and compromise its structural integrity.
Ignoring Post-Smoothing Care
Proper cleaning and sealing are crucial to maintain the finish and protect your newly smoothed edges.
DIY vs. Hiring a Professional
When to DIY
DIY methods are typically sufficient for small projects, such as smoothing edges on a newly poured sidewalk or a minor repair on your patio. If you’re comfortable using tools and have the time, it can be a cost-effective solution.
When to Call a Professional
For large-scale projects or structural repairs, it’s best to hire a professional. This includes significant cracks, excessive damage, or any changes that might affect the stability of the concrete.
Conclusion
Smoothing rough concrete edges is a vital step in maintaining safe, attractive, and durable surfaces. With the right tools, techniques, and a bit of patience, you can achieve professional-looking results. Don’t let rough edges go unchecked – take action today to enhance your concrete surfaces!
FAQ Section
Q1: Can I smooth concrete edges without power tools?
Yes, hand tools like concrete sandpaper or a hand file can be used, though it may take more time and effort.
Q2: How long does it take to smooth rough concrete edges?
The time varies depending on the size of the area and the tools used. Most projects can be completed in a few hours using power tools.
Q3: What type of sandpaper should I use for concrete?
Use coarse-grit diamond sandpaper or specialized concrete sandpaper for optimal results.
Q4: Can I use a regular sander for smoothing concrete?
No, use tools specifically designed for concrete to avoid damaging the surface or the tool itself.
Q5: How do I prevent dust while grinding concrete?
Use a wet grinder or attach a vacuum to your tool to minimize dust production. This will make the job safer and cleaner.